Cart
0
Recording high-quality audio at home doesn’t have to be complicated. By avoiding common rookie mistakes, optimizing your space, and refining your mixing techniques, you can achieve professional-sounding results without breaking the bank.
Common Home Studio Mistakes: How to Avoid Rookie Errors in Audio Recording and Mixing
Key Takeaways
- Proper microphone placement is critical for capturing clean, natural sound.
- Room acoustics significantly affect recording clarity and mixing accuracy.
- Avoid overusing presets and effects; trust your ears and experiment.
- Simple acoustic treatments and mindful mixing bring out the best in your audio.
Table of Contents
- 1. The Best Mic Placement for Clear Recordings
- 2. The Silent Influence of Room Acoustics on Your Sound
- 3. Overusing Effects and Presets: Experimenting for a Unique Sound
- Frequently Asked Questions
1. The Best Mic Placement for Clear Recordings
One of the most common and impactful mistakes beginners make is incorrect microphone positioning. Getting this right ensures your recordings capture a clean and natural sound, free from distortion and unwanted noise.
Why Mic Placement Matters
- Too far from the mic: Your voice or instrument will sound thin, distant, and echoey because the mic picks up more room noise and reflections.
- Too close to the mic: This can cause distortion, clipping, and strong plosives—those popping “p” and “b” sounds—and make sibilant “s” sounds harsh and unpleasant.
The Right Way to Place the Mic
- Maintain a distance of about 4 to 6 inches from your mouth or sound source. Some prefer positioning slightly off-axis at 6 to 10 inches to reduce sibilance and plosives.
- Use a pop filter placed between the microphone and vocalist to diffuse plosive bursts of air hitting the mic.
- Keep the mic away from reflective surfaces like walls and hard furniture to avoid muddy reflections and resonance that degrade sound clarity.
By following these simple principles, you set a strong foundation for recordings that require less correction later and preserve the natural character of your performance.
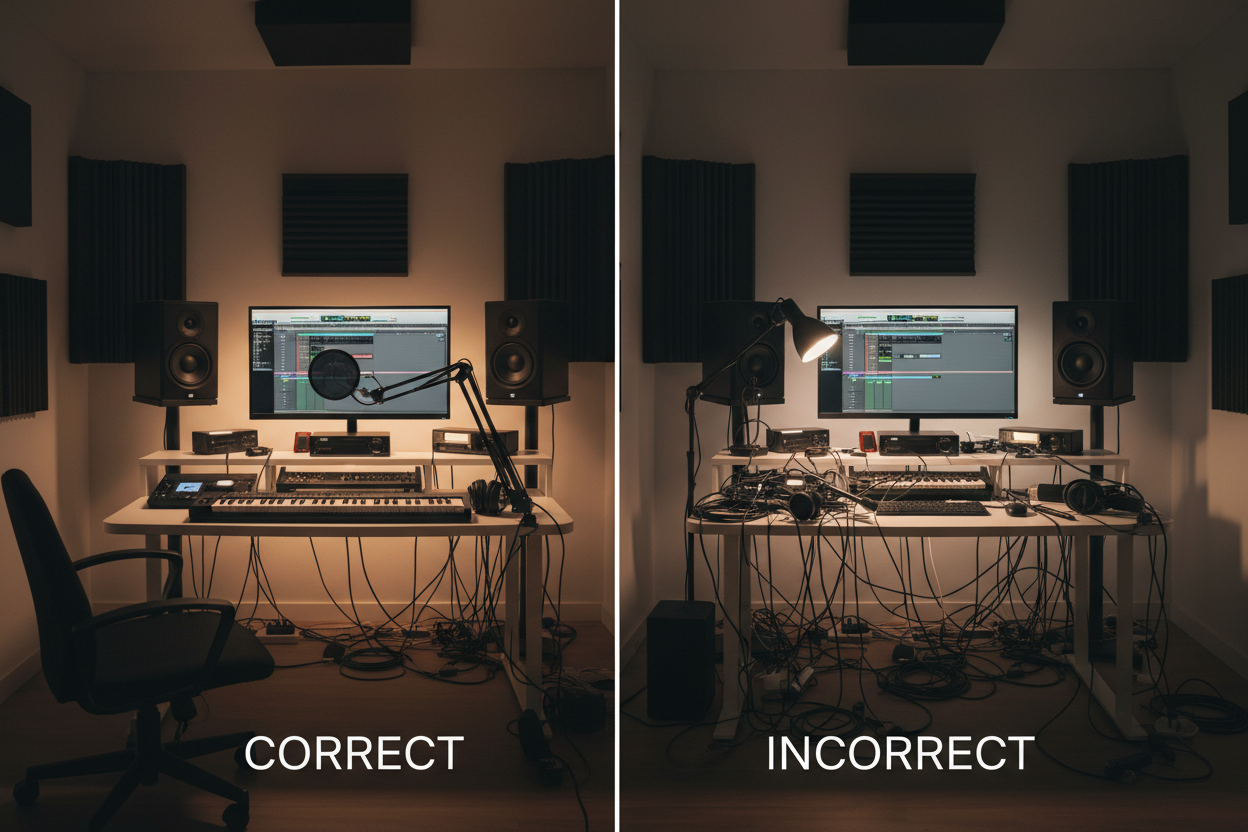
2. The Silent Influence of Room Acoustics on Your Sound
Many beginners underestimate how much their room affects their recordings and mixing results. An untreated space can introduce echoes, unwanted reverb, and bass buildups that confuse your ears and compromise sound quality.
Understanding Acoustic Challenges
- Unprocessed rooms cause natural reverberation and echo that can make your recordings sound distant or unclear.
- Small rooms often suffer from low-frequency resonance and standing waves, which mask true bass levels and mislead mixing decisions.
Room Acoustics Enhancement Tips
- Install acoustic panels on wall surfaces where sound reflections are strongest to absorb unwanted echoes.
- Use bass traps in corners—vertical and ceiling intersections—to tame low-frequency resonance effectively.
- Position your nearfield monitors thoughtfully, away from walls or corners, to achieve a clearer and balanced bass response.
If acoustic treatment isn’t feasible, try recording closer to your sound source, and use directional microphones to minimize capture of room ambiance. Improving your room’s acoustic environment not only enhances the clarity of your recordings but also leads to more accurate and confident mixing choices.
3. Overusing Effects and Presets: Experimenting for a Unique Sound
Beginner producers often lean heavily on plug-in presets and overuse effects like compression and EQ in an attempt to fix issues or craft their sound quickly. However, this can strip the life and individuality from your recordings, resulting in generic and uninspired mixes.
The Pitfalls of Preset Dependence
- Presets don’t take into account your specific recording environment or unique vocal/instrument traits.
- Too much compression kills dynamics, causing pumped or harsh vocal artifacts.
- Blind EQ boosting or cutting can introduce phase problems and unnatural tonal shifts.
Mixing Effects Recommendations
- Use gentle compression alongside manual volume automation to retain natural dynamics.
- Adjust EQ by ear, enhancing your sound’s character rather than chasing perfection.
- Experiment with stereo panning to build balanced mixes rather than relying solely on presets.
- Learn the fundamentals of each effect plugin to understand how small tweaks influence your mix.
Personal experimentation and careful listening will help you develop mixes with unique character and professional polish.
“The most crucial skill in home recording is developing a trained ear to identify when less is truly more.”
下記で、私たちは普遍的なホームスタジオのミスを避ける方法を理解しているだけでなく、スタジオの環境を効果的に設定し、クリーンなトラックを録音し、効果的にミックスし、丁寧で専門的な音声を育てる方法について解説します。それは読んで理解しやすくて、流れがある文章に仕上がりました。続きは次のページからご覧ください。
Frequently Asked Questions
- How far should I place the mic from my mouth?
- What are the best ways to treat my room acoustically on a budget?
- Why shouldn’t I rely heavily on presets during mixing?
How far should I place the mic from my mouth?
Aim for about 4 to 6 inches between your mouth and the microphone. This distance helps you capture a balanced, natural sound without distortion or excess room noise. Adjusting slightly off-axis or further back (6 to 10 inches) can help reduce plosives and harsh sibilants.
What are the best ways to treat my room acoustically on a budget?
Simple solutions include placing foam panels or thick blankets on reflective surfaces, adding DIY bass traps made from rockwool or dense foam in corners, and positioning your monitors away from walls. Even small changes make a noticeable difference in reducing echoes and bass problems.
Why shouldn’t I rely heavily on presets during mixing?
Presets are generic starting points that don’t account for your unique recording conditions or sound sources. Overusing them can lead to unnatural tones, loss of dynamics, and a cookie-cutter sound. Instead, use presets as references and trust your ears to tailor effects to your material.
Ready to upgrade your home studio gear? Check out top recording microphones and acoustic treatment options to elevate your sound.